

Can a moderator add this to the projects area if they find it fit? I don't have "new thread" privileges in the projects forum.
Hi. Initially confused about the external ignition module and external ignition coil mod I thought I would create a write up complete with many pictures to help others like others have helped me (thanks again Mike94PGT). So let's get started.
THIS MOD IS FOR 93-94 MX6 V6 models ONLY. For a 95 the wiring is a little bit different!
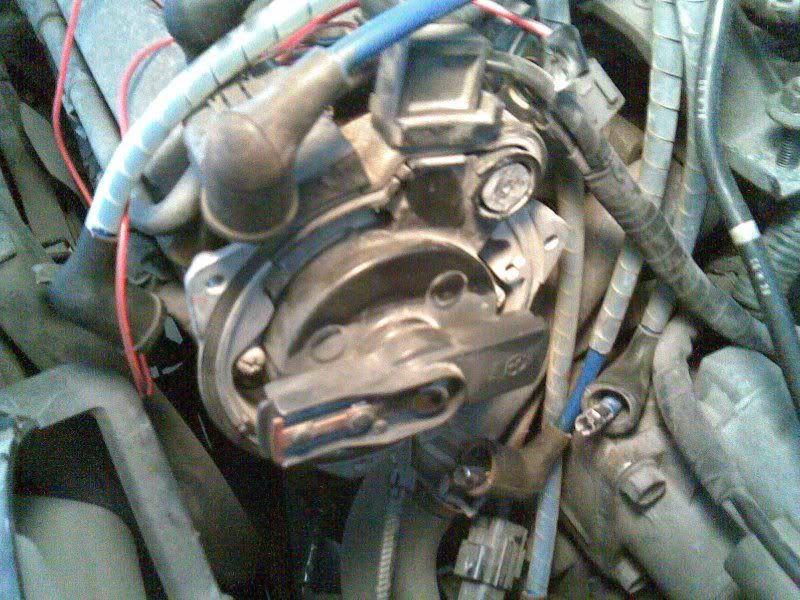
My reason for doing the mod is a little embarrassing... I did an compression test, but never unplugged the 2 connections going into the distributor. (as a side note of advice; read before you do) So a large amount of voltage broke the ignition coil, and ignition module. Basically.
![Image]()
Those 2. So when you do your compression test... unplug those. Another reason to do this mod would be if you wanted to use an after market coil, which is really for the racers only, not for us street/daily drivers, so I wouldn't bother if its not broken to start with. :shrug:
Now for the mod:
Firstly, you are going to need a few things:
-An HEI 4 Pin Ignition Module (available at: Napa, Partsource, Autozone, Bumper to Bumper, or even Canadian Tire; when they ask for what car it's for, tell them it is for a 1982 Chevrolet Chevette.)
I spent 50 bucks Canadian on mine. If you don't want to spend that money, go to a local "pick your part" and tear the distributor cap off an 80s GM car to find one inside.
Some manufacturers and part #s:
Echlin TP45
Blue Streak LX301
Neihoff DR400 <---- This is the one I have. Got it from Partsource.
Wells DR100
Filko DR300
KEM E200
Delco D1906
Looks Like this:
![Image]()
-An external coil. A good coil to pick up would be an MSD Blaster 2 high output coil. Not too expensive. I used a coil from a Nissan 280zx turbo. Maybe because I am a poor student, but mostly because a coil is a coil is a coil when it comes to street use. This is for anyone that tells me a coil is not a coil is not a coil: NO ONE (but ricers) DRIVES AROUND AT 8000 RPM IN FIRST GEAR. SO THE DIFFERENCE A HIGH OUTPUT COIL MAKES IS MOOT. It also doesn't cost a lot for a nice new one... your choice. If You don't have one kicking around I would head down and pick one up.
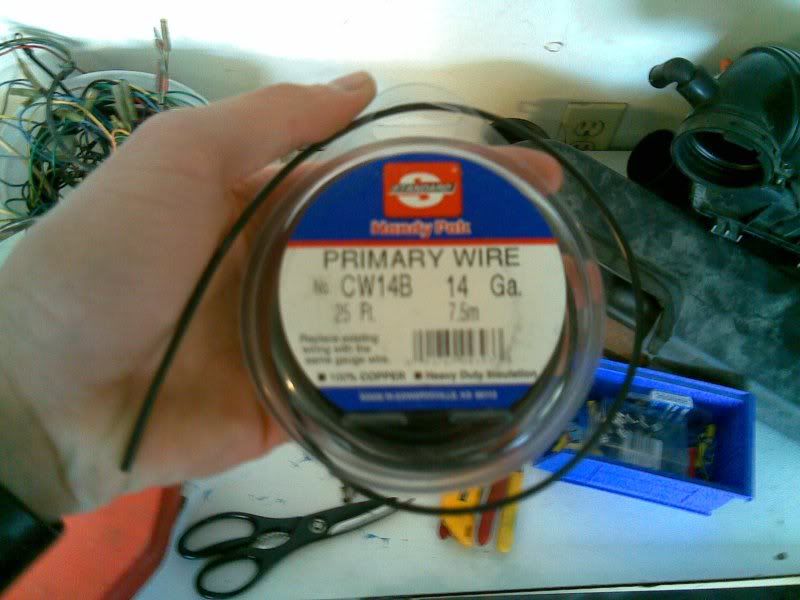
-A large amount of 14-16 gauge wire. I've heard people using 18 gauge for all but one connection, but wire is cheap, and the larger the gauge the less the resistance for current, and the smaller the heat build up in the HEI module. (apparently) I bought 25' of 14 gauge for about 4 bucks Canadian.
![Image]()
-A 1/2 watt 1000 Ohm Resistor (if you want your tach to work for longer then 13 seconds) They are available a little electronics stores all over the place. There is no more Radio Shack where I am from so I found a place called Action Electronics in Edmonton. Cost me a dollar and a half for 5 resistors... only needed one but whatever. They look like this:
![Image]()
-Wiring Shrink Wrap. This isn't necessary but I highly recommend it. It cleans up soldered connections incredibly well. The stuff is about 5 bucks for a package of assorted radii, and shrinks with nothing but the heat of the soldering iron. (I used a benzene torch, but thats just because it goes quicker, but the iron will work fine)
-Solder, flux, and a soldering iron. Hopefully you have these supplies, otherwise they are available an any tool store. Easy to use... if you don't know how to use these things, go HERE.
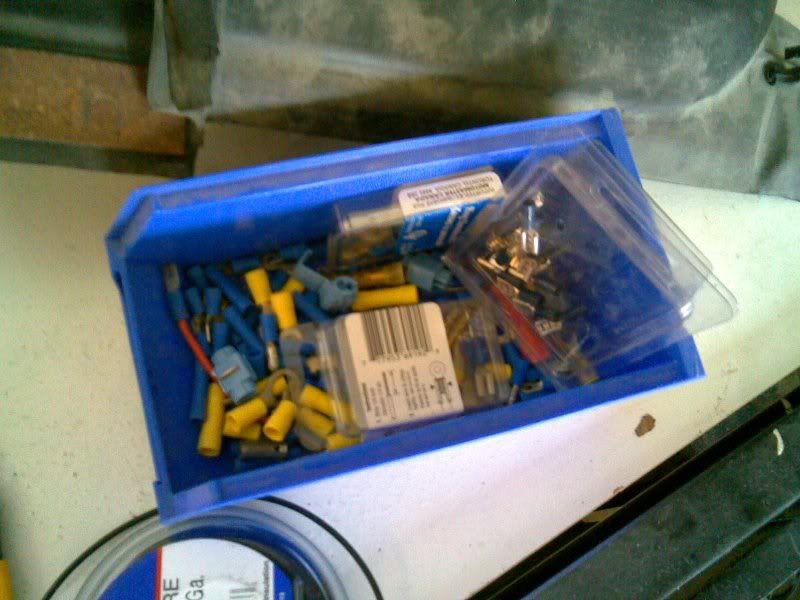
-A pile of 1/4 inch 14-16 gauge "female disconnects," and a pile of assorted sizes of ring terminals. One that fits the negative battery terminal ground connection, some smaller ones that fit the HEI module and some some "medium sized" that fit the positive and negative posts of the ignition coil. Available at Auto stores. I got some at Partsource, and more (when I ran out) at Bumper to Bumper. Plus my resourceful father had a boxful of assorted connecters:
![Image]()
-A distributor cap that you aren't afraid of bastardizing. I used my original... If I screwed up I could just spend 20 bucks on a new one.. :shrug:
-A tube of RTV silicone and a cocking gun. (or whatever means you want to dispense it)
-A coil wire. It is basically a spark plug wire. I got mine at Partsource. I walked in an asked the guy, he took me to the back, I chose which one I wanted and he let me have it free of charge! Shouldn't cost more then a couple bucks. Make sure you get the resistor type wire, otherwise you might have signal distortion in your radio.
-Assorted tools; socket set, screwdrivers, knife, wire cutter, wire stripper, pliers...
-A case of mountain dew.
-Lots of time. Cost: a pissed off girlfriend.
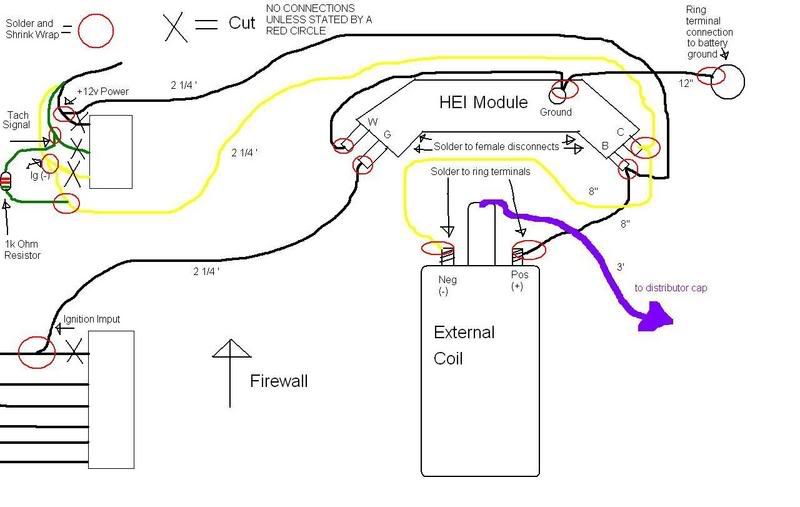
Time to take a look at the schematic of out ultimate goal:
(thanks to joe bialy for this diagram)
![Image]()
The arrow coming off the "new coil" is where we have to make the connection into our distributor cap, so that the spark will reach the rotor.
Now that we have all our supplies and know what we got to do, we got to do a little bit of thinking... where do we want to mount our coil? Where do we want to mount our HEI module? Once we know all this, we can cut our wire to the proper length and begin crimping and soldering the connecters on.
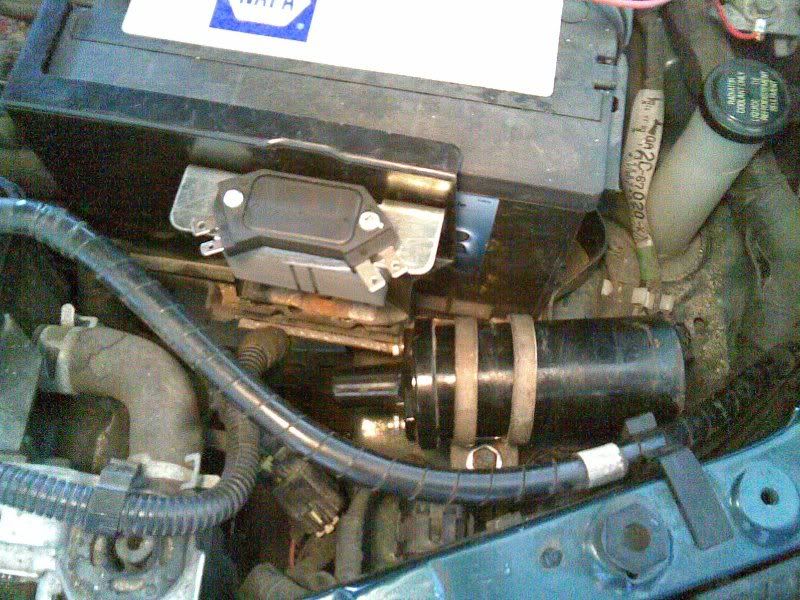
For my configuration of mounting I needed my +12v - pin b, -IG - pin c, and ignition input - pin g wires to be about 2 1/4 feet long to run from the harness to my mounting location. My pin w - base was about 5 inches long, and my base to ground wire was about a foot long. My +12v to coil was 8 inches as was the negative. I mounted my HEI module and ext. coil in front of the battery, by the drivers side headlight. More on what I did to mount later. Let's get this car started already!
![Image]()
The best way IMO (I'm no master, but it has worked very well for me in the past) to make a solid connection using crimp connectors is to cut off that stinking plastic piece off with a knife, slide some shrink wrap over the wire, crimp the metal connector on so that it is flush with the wire's insulation, solder (with flux) the connection, and finally shrink the shrink wrap so the connection is protected.
For the pin connections using the female disconnects, I stole some beautiful rubber hoods for female disconnects off of a 280zx's interior wiring ... (THERE IS TONS! steal some off of a car next time you are at a pick your part.) I slipped these onto the wire before I crimped and soldered in ADDITION to the shrink wrap. As a side note, for my B & C pin connections, I pried the female disconnect open a little wider, so that it would fit 2 wires inside, one coming from the wiring harness, the other going to the coil. For my C connection I did not run a wire all the way from the tach signal connection on my wiring harness to the Pin itself on the HEI module, like Joe Bialy's picture shows. I connected right after the resister to the C wire. Here is a wiring diagram I drew up to show you what I mean, and to explain all the lengths I mentioned earlier:
![Image]()
The most important question: how are we going to make the crucial connection to the distributor from the output of the coil?
Since I am using the stock air box, I do not have much room on the flat even top of my distributor, so I couldn't do an installation like the one on project Mazda:
![Image]()
so I did this:
![Image]()
Cut off plastic insulation, and threaded the aluminum stud with a tap and die set.
![Image]()
Then soldered a ring terminal on the end of the high voltage coil wire, and bolted it from either side to the stud. then I dremeled off any remaining stud, so that I would have minimum modification to do to the rest of the distributor. I used RTV silicone to completely seal the entire connection that was made inside of the distributor cap. ( I have yet to do another coat for good measure) I then had to modify my distributor base so that this block of silicone wouldn't interfere with the fitting of the cap onto the base:
![Image]()
see how I dremeled down the female part that used to accept the old stud? I then pumped the hole full of sealant, so that nothing inside could possibly ever act as a ground for my spark.
Now I have a wire coming off, (while not very removable from the distributor side, it does its job well) that can accept high voltage from the coil, and NOT interfere with the stock air box. :angel:
With everything hooked up like it should be, and all connections secure, (MAKE SURE YOU DO A FANTASTIC JOB SOLDERING! DON'T RUSH!) double check the diagrams and your wiring to make for sure that it's right. Dont forget to put the disty cap back on too! dUh! RE-hook up your battery and have an assistant keep watch on the coil connections for severe arcing while you start the engine. If you did it right, you should see this:
![Image]()
beautiful isn't it?
I will hopefully have another writeup on HEI module mounting in a couple days, but this young fella has had it with typing, and it's time for bed..
peace.:tup:
Hi. Initially confused about the external ignition module and external ignition coil mod I thought I would create a write up complete with many pictures to help others like others have helped me (thanks again Mike94PGT). So let's get started.
THIS MOD IS FOR 93-94 MX6 V6 models ONLY. For a 95 the wiring is a little bit different!
My reason for doing the mod is a little embarrassing... I did an compression test, but never unplugged the 2 connections going into the distributor. (as a side note of advice; read before you do) So a large amount of voltage broke the ignition coil, and ignition module. Basically.

Those 2.
So when you do your compression test... unplug those. Another reason to do this mod would be if you wanted to use an after market coil, which is really for the racers only, not for us street/daily drivers, so I wouldn't bother if its not broken to start with. :shrug:Now for the mod:
Firstly, you are going to need a few things:
-An HEI 4 Pin Ignition Module (available at: Napa, Partsource, Autozone, Bumper to Bumper, or even Canadian Tire; when they ask for what car it's for, tell them it is for a 1982 Chevrolet Chevette.)
I spent 50 bucks Canadian on mine. If you don't want to spend that money, go to a local "pick your part" and tear the distributor cap off an 80s GM car to find one inside.
Some manufacturers and part #s:
Echlin TP45
Blue Streak LX301
Neihoff DR400 <---- This is the one I have. Got it from Partsource.
Wells DR100
Filko DR300
KEM E200
Delco D1906
Looks Like this:

-An external coil. A good coil to pick up would be an MSD Blaster 2 high output coil. Not too expensive. I used a coil from a Nissan 280zx turbo. Maybe because I am a poor student, but mostly because a coil is a coil is a coil when it comes to street use. This is for anyone that tells me a coil is not a coil is not a coil: NO ONE (but ricers) DRIVES AROUND AT 8000 RPM IN FIRST GEAR. SO THE DIFFERENCE A HIGH OUTPUT COIL MAKES IS MOOT. It also doesn't cost a lot for a nice new one... your choice. If You don't have one kicking around I would head down and pick one up.
-A large amount of 14-16 gauge wire. I've heard people using 18 gauge for all but one connection, but wire is cheap, and the larger the gauge the less the resistance for current, and the smaller the heat build up in the HEI module. (apparently) I bought 25' of 14 gauge for about 4 bucks Canadian.
-A 1/2 watt 1000 Ohm Resistor (if you want your tach to work for longer then 13 seconds) They are available a little electronics stores all over the place. There is no more Radio Shack where I am from so I found a place called Action Electronics in Edmonton. Cost me a dollar and a half for 5 resistors... only needed one but whatever. They look like this:

-Wiring Shrink Wrap. This isn't necessary but I highly recommend it. It cleans up soldered connections incredibly well. The stuff is about 5 bucks for a package of assorted radii, and shrinks with nothing but the heat of the soldering iron. (I used a benzene torch, but thats just because it goes quicker, but the iron will work fine)
-Solder, flux, and a soldering iron. Hopefully you have these supplies, otherwise they are available an any tool store. Easy to use... if you don't know how to use these things, go HERE.
-A pile of 1/4 inch 14-16 gauge "female disconnects," and a pile of assorted sizes of ring terminals. One that fits the negative battery terminal ground connection, some smaller ones that fit the HEI module and some some "medium sized" that fit the positive and negative posts of the ignition coil. Available at Auto stores. I got some at Partsource, and more (when I ran out) at Bumper to Bumper. Plus my resourceful father had a boxful of assorted connecters:
-A distributor cap that you aren't afraid of bastardizing. I used my original... If I screwed up I could just spend 20 bucks on a new one.. :shrug:
-A tube of RTV silicone and a cocking gun. (or whatever means you want to dispense it)
-A coil wire. It is basically a spark plug wire. I got mine at Partsource. I walked in an asked the guy, he took me to the back, I chose which one I wanted and he let me have it free of charge! Shouldn't cost more then a couple bucks. Make sure you get the resistor type wire, otherwise you might have signal distortion in your radio.
-Assorted tools; socket set, screwdrivers, knife, wire cutter, wire stripper, pliers...
-A case of mountain dew.
-Lots of time. Cost: a pissed off girlfriend.
Time to take a look at the schematic of out ultimate goal:
(thanks to joe bialy for this diagram)

The arrow coming off the "new coil" is where we have to make the connection into our distributor cap, so that the spark will reach the rotor.
Now that we have all our supplies and know what we got to do, we got to do a little bit of thinking... where do we want to mount our coil? Where do we want to mount our HEI module? Once we know all this, we can cut our wire to the proper length and begin crimping and soldering the connecters on.
For my configuration of mounting I needed my +12v - pin b, -IG - pin c, and ignition input - pin g wires to be about 2 1/4 feet long to run from the harness to my mounting location. My pin w - base was about 5 inches long, and my base to ground wire was about a foot long. My +12v to coil was 8 inches as was the negative. I mounted my HEI module and ext. coil in front of the battery, by the drivers side headlight. More on what I did to mount later. Let's get this car started already!
The best way IMO (I'm no master, but it has worked very well for me in the past) to make a solid connection using crimp connectors is to cut off that stinking plastic piece off with a knife, slide some shrink wrap over the wire, crimp the metal connector on so that it is flush with the wire's insulation, solder (with flux) the connection, and finally shrink the shrink wrap so the connection is protected.
For the pin connections using the female disconnects, I stole some beautiful rubber hoods for female disconnects off of a 280zx's interior wiring ... (THERE IS TONS! steal some off of a car next time you are at a pick your part.) I slipped these onto the wire before I crimped and soldered in ADDITION to the shrink wrap. As a side note, for my B & C pin connections, I pried the female disconnect open a little wider, so that it would fit 2 wires inside, one coming from the wiring harness, the other going to the coil. For my C connection I did not run a wire all the way from the tach signal connection on my wiring harness to the Pin itself on the HEI module, like Joe Bialy's picture shows. I connected right after the resister to the C wire. Here is a wiring diagram I drew up to show you what I mean, and to explain all the lengths I mentioned earlier:
The most important question: how are we going to make the crucial connection to the distributor from the output of the coil?
Since I am using the stock air box, I do not have much room on the flat even top of my distributor, so I couldn't do an installation like the one on project Mazda:

so I did this:
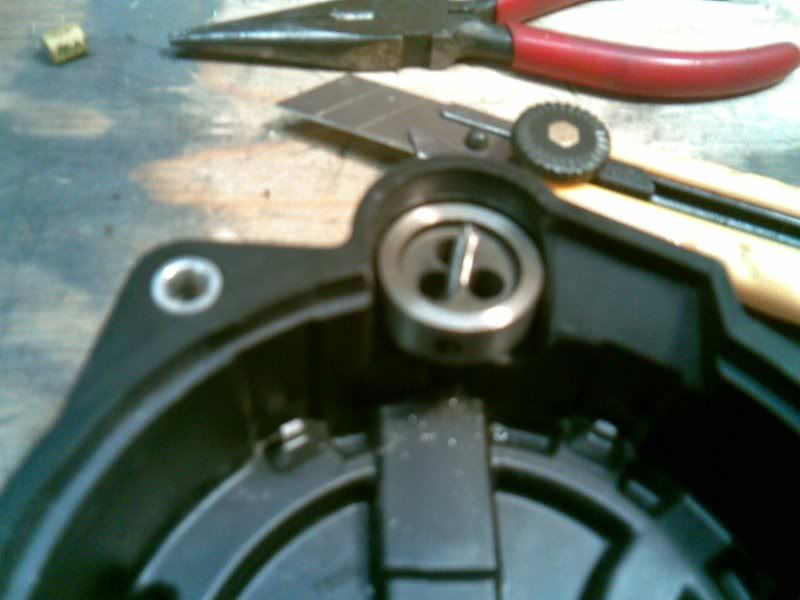
Cut off plastic insulation, and threaded the aluminum stud with a tap and die set.
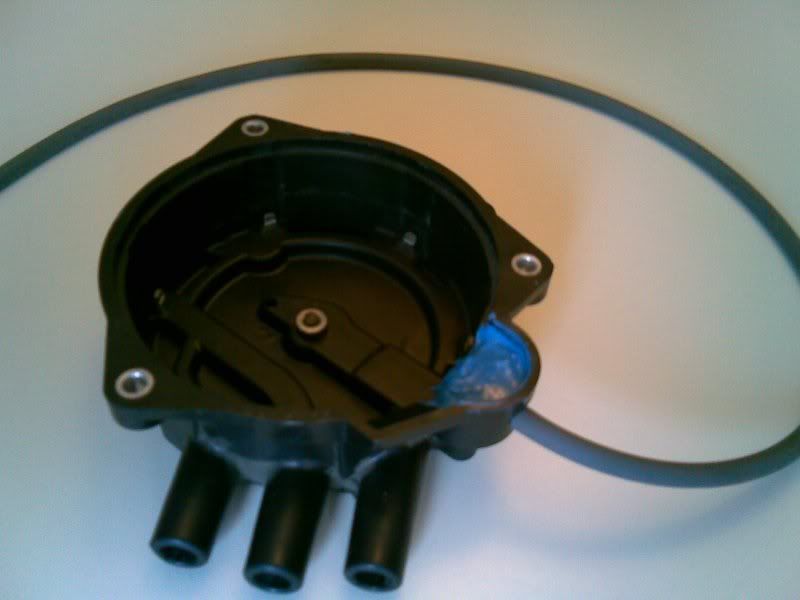
Then soldered a ring terminal on the end of the high voltage coil wire, and bolted it from either side to the stud. then I dremeled off any remaining stud, so that I would have minimum modification to do to the rest of the distributor. I used RTV silicone to completely seal the entire connection that was made inside of the distributor cap. ( I have yet to do another coat for good measure) I then had to modify my distributor base so that this block of silicone wouldn't interfere with the fitting of the cap onto the base:
see how I dremeled down the female part that used to accept the old stud? I then pumped the hole full of sealant, so that nothing inside could possibly ever act as a ground for my spark.
Now I have a wire coming off, (while not very removable from the distributor side, it does its job well) that can accept high voltage from the coil, and NOT interfere with the stock air box. :angel:
With everything hooked up like it should be, and all connections secure, (MAKE SURE YOU DO A FANTASTIC JOB SOLDERING! DON'T RUSH!) double check the diagrams and your wiring to make for sure that it's right. Dont forget to put the disty cap back on too! dUh! RE-hook up your battery and have an assistant keep watch on the coil connections for severe arcing while you start the engine. If you did it right, you should see this:
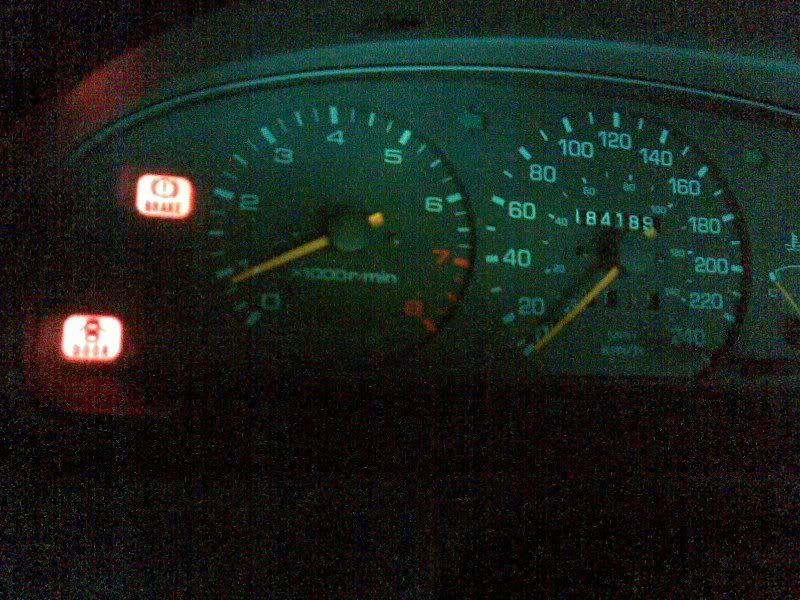
beautiful isn't it?
I will hopefully have another writeup on HEI module mounting in a couple days, but this young fella has had it with typing, and it's time for bed..
peace.:tup:


